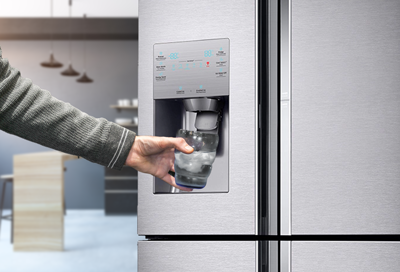
If your Samsung ice maker is frozen, start by unplugging the fridge for safety. Remove and empty the ice bin, discarding any clumped ice. Check the water line for kinks or debris and ensure it’s securely connected. Use a hairdryer to melt ice buildup or let it defrost naturally by leaving the door open. Wipe down the area thoroughly. Once everything’s clear, plug the fridge back in and restart the ice maker. If you follow these steps and you’re still having issues, there’s more you can explore to get it working perfectly again.
Identify the Problem
The first step in fixing your frozen Samsung ice maker is to identify the root cause of the issue. Start by checking for visible ice buildup around the ice maker and the ice chute. If you see ice blocking these areas, it’s likely a defrost issue.
Next, inspect the ice maker’s water supply line for any kinks or blockages. A restricted water flow can cause freezing problems.
Now, take a look at the water filter. If it’s clogged or overdue for a replacement, it could be hindering water flow, contributing to the freezing issue. Don’t forget to check the freezer’s temperature settings. If it’s set too low, it might be freezing the ice maker components.
Additionally, examine the ice maker’s internal components, such as the ice tray and motor. Any signs of damage or malfunctioning parts could be the culprit.
Unplug the Refrigerator
Disconnecting the refrigerator from its power source is a critical first step in safely addressing your frozen Samsung ice maker. Start by locating the power cord at the back of your refrigerator. Carefully pull the refrigerator away from the wall to give yourself enough space to reach the plug. Make sure you’ve got a firm grip on the plug itself, not the cord, to avoid any potential damage.
Once you’ve unplugged the refrigerator, wait a few moments to ensure that all electrical components have fully powered down. This step is essential for your safety and prevents any electrical hazards while you work on the ice maker.
During this time, you can also take a quick look at the cord and plug for any signs of wear or damage.
Empty the Ice Bin
Begin by removing the ice bin from the freezer to gain full access to the ice maker. First, open the freezer door and locate the ice bin. Most Samsung ice bins slide out easily, but you may need to lift slightly to disengage the bin from its tracks. Once removed, place the ice bin on a stable surface.
Next, empty the ice bin completely. Discard any ice that looks clumped or frosted together, as this could be a sign that the ice maker is malfunctioning. You can use warm water to melt any ice that’s stuck to the bin. After emptying, dry the bin thoroughly with a clean towel to prevent any residual moisture from refreezing.
Here’s a quick guide to help you:
| Step | Action | Purpose |
|---|---|---|
| 1. Locate | Find the ice bin in freezer | Gain access to ice maker |
| 2. Remove | Slide or lift out the bin | Prepare for cleaning |
| 3. Empty | Discard ice and melt clumps | Identify and remove blockages |
| 4. Dry | Wipe with a clean towel | Prevent refreezing of moisture |
Check the Water Line
Now that the ice bin is empty and dry, inspect the water line for any kinks or blockages. Start by locating the water line, which typically runs from the back of the fridge to the ice maker. Carefully examine the entire length of the line. Look for any obvious bends or twists that could impede water flow. Even minor kinks can cause significant issues.
Next, disconnect the water line from the refrigerator. You might need a wrench or pliers for this step. Once disconnected, run water through the line to check for blockages. If the water flows freely, your line is clear. If not, you’ve likely found the culprit. Use a pipe cleaner or a similar tool to remove any debris or ice buildup.
After clearing the line, reconnect it securely to the fridge. Make sure it’s tight enough to prevent leaks but not so tight that it damages the connection.
Defrost the Ice Maker
Why not start by defrosting the ice maker to eliminate any frozen blockages that might be causing the issue? First, unplug your refrigerator to ensure safety.
Then, remove the ice bin and any loose ice. You can use a hairdryer to gently melt the ice buildup. Hold the hairdryer a few inches away, moving it back and forth to avoid damaging the plastic parts. This process might take around 10-15 minutes.
Alternatively, if you prefer a less hands-on approach, you can leave the refrigerator door open and let the ice melt naturally. This method is slower and might take several hours, but it’s just as effective. Placing towels around the ice maker can help absorb the melting water and prevent any mess.
After the ice has melted, wipe down the area to remove any residual moisture. Reconnect the refrigerator and wait for the ice maker to reset and start producing ice again.
If it still doesn’t work, you might need to repeat the defrosting process or consider further inspection. By starting with defrosting, you address one of the most common issues with frozen ice makers directly and efficiently.
Inspect the Ice Maker Components
With the ice maker defrosted, it’s time to check the individual components for any signs of damage or malfunction. Start by examining the ice tray for cracks or warping. A damaged tray can lead to leaks and improper ice formation.
Next, check the water inlet valve. This valve controls the flow of water into the ice maker, and if it’s clogged or faulty, it can prevent ice production.
Now, inspect the ice maker’s motor and gears. These components are crucial for moving the ice from the tray to the dispenser. Listen for unusual noises or look for visible wear and tear. If you notice anything amiss, the motor or gears may need to be replaced.
Here’s a quick checklist to guide your inspection:
- Ice Tray: Look for cracks, warping, or any signs of damage that could affect ice production.
- Water Inlet Valve: Ensure it’s not clogged and is functioning correctly.
- Motor and Gears: Check for unusual noises, visible wear, or damage.
Restart and Test the Ice Maker
Once you’ve inspected and repaired any damaged components, plug the ice maker back in and turn it on to test its functionality. Ensure you’ve securely reconnected any electrical connections and water supply lines.
Now, press and hold the ‘Test’ button, which is typically located on the side or bottom of the ice maker. You should hear a chime indicating the test cycle has started.
Observe the ice maker during this test cycle. Listen for the sound of water filling the ice mold and watch for the mechanical components moving. If you’ve done everything correctly, the ice maker should begin producing ice within a few hours. Be patient, as it might take a bit of time for the first batch to drop.
If the ice maker doesn’t start making ice, check the troubleshooting steps you followed earlier. Ensure there’s no remaining ice obstruction, the water line isn’t kinked, and the unit is correctly leveled.
Sometimes, resetting the ice maker by unplugging it for about five minutes and then plugging it back in can resolve lingering issues. After doing this, repeat the test cycle. If the problem persists, you might need professional assistance.
Frequently Asked Questions
How Often Should I Clean My Samsung Ice Maker?
You should clean your Samsung ice maker every six months to ensure optimal performance. Regular cleaning prevents buildup and keeps your ice fresh. Don’t forget to follow the manufacturer’s guidelines for the best results.
Can Using Hard Water Cause My Ice Maker to Freeze Up?
Yes, using hard water can cause your ice maker to freeze up. Mineral deposits from hard water can accumulate and block the ice maker’s components, leading to malfunctions. Regular maintenance and using filtered water can help.
Are There Any Specific Tools Needed to Fix a Frozen Ice Maker?
You don’t need many tools to fix a frozen ice maker. A hairdryer, a small towel, and a screwdriver should do the trick. Just ensure you unplug the appliance before you start working on it.
Is There a Warranty That Covers Ice Maker Issues for Samsung Refrigerators?
You might be wondering if your Samsung refrigerator’s ice maker issues are covered under warranty. Typically, Samsung provides a one-year warranty on parts and labor, but you should check your specific model’s warranty for details.
Can a Power Surge Cause My Ice Maker to Freeze Up?
Yes, a power surge can cause your ice maker to freeze up. It might disrupt the internal electronics, leading to malfunctions. You should use a surge protector to safeguard your appliances from electrical surges.
Conclusion
You’ve now tackled the essential steps to fix your frozen Samsung ice maker. By identifying the problem, unplugging the fridge, emptying the ice bin, checking the water line, defrosting the ice maker, inspecting components, and restarting the system, you should see a return to normal ice production.
If issues persist, it might be time to call a professional. Great job taking control and giving it your best shot! Now, enjoy that ice-cold refreshment.
